Video game consoles are becoming increasingly popular as a source of entertainment for both children and adults alike. Attaching a video game console to a television is an important step in being able to enjoy gaming experiences. This article outlines the necessary steps required to attach a video game console to a television, including what cables are needed, how they should be connected and any configuration settings that may need to be adjusted on the television itself. After following these steps, users will have successfully attached their video game console and can begin playing.
In order to ensure successful attachment of the console, it is important that the correct cables are used for both the console and the TV. The necessary cables must also be properly connected between both devices before any configuration settings can be adjusted on the TV itself. Following these steps carefully will ensure that gamers get maximum enjoyment out of their experience with their chosen video game system.
Gather the Necessary Cables
In order to establish a connection between the gaming device and television, necessary cables must be obtained. The specific type of cable required will depend on the type of game console being used. For example, with an Xbox One or PlayStation 4, an HDMI cable is needed to attach these consoles to the TV. If playing older devices such as Nintendo 64 or Sega Genesis, then RCA composite video cables are needed for connection. Regardless of the type of game console utilized, it is important that video cables are compatible with both the television and gaming device in order for this process to be successful.
When purchasing video cables, factors like length and quality should be taken into consideration. In most cases longer cables can provide more flexibility when setting up a gaming system in relation to where players sit and how far away they are from the TV; however having too long of a cable can create performance issues if high-quality components are not used. Therefore it is important to select appropriate length cables that offer excellent picture quality and reliable performance before making any connections between the television and gaming device.
Once all necessary components have been acquired, gamers can start establishing their own video game setup by following instructions provided by their particular game console manufacturer while attaching their gaming device directly to their television using available video cables.
Connect the Cables to the Console
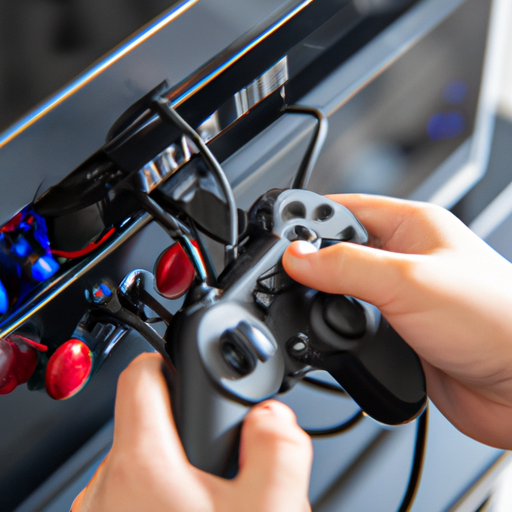
Establishing a connection between the console and television requires the appropriate cables to be linked. Audio options such as HDMI and optical provide ways of creating a digital connection. HDMI is preferable when it comes to high-definition video, while optical provides better sound quality. Additionally, different cable types should be used depending on the model of console being used. For instance, an S-video cable is necessary for older consoles such as the PlayStation 2, while newer systems such as Xbox One require an AV cable or HDMI cord.
Once all the necessary cables have been gathered and connected to both devices, users can begin setting up their console for use with their television set. This may involve changing some settings within specific menus on the console itself in order to ensure that the visuals are displayed correctly onscreen. Furthermore, audio levels need to be adjusted in order to achieve optimal performance; this may require tinkering with certain sound settings or altering particular preferences on either device.
The process of attaching a video game console to a television entails more than simply connecting two pieces of equipment together; it also involves configuring various components so that they work in tandem with each other. Having knowledge of audio options like HDMI and optical will help determine which type of cable should be utilized based on what system is being used. Subsequently, making adjustments within specific menus can help create a seamless experience between both devices ultimately resulting in optimal gaming performance from start to finish.
Connect the Cables to the TV
Carefully connecting the right cables to a television can be essential for achieving a seamless gaming experience. When connecting an older console such as Super Nintendo Entertainment System (SNES), it is important to determine the type of connection required. For instance, some types of TV may require an RCA cable or composite connection while others may require an HDMI cable. It is also important to consider the discussion types supported by both the TV and the console when selecting a cable. For example, if one has a modern television with HDMI ports but an outdated console that only supports composite connections, then it is necessary to use adapter cables.
Once the appropriate cable has been selected, it can be connected from the console’s output port to one of the TV’s input ports. If successful, this will allow gamers to view games on their television rather than directly from their game system. However, if there are still problems even after properly connecting all cables and adapters, then further troubleshooting might be necessary. This could include ensuring that both devices are powered on and that all settings have been configured correctly on both devices before attempting any further tests or solutions.
It is also possible that additional hardware components may need to be purchased in order for gaming consoles to work properly with modern TVs. For instance, some newer TVs do not support certain connectors used by older consoles such as RCA or component cables; in these cases specialized adapter hardware must be purchased in order for users to achieve successful connections between their TV and game system. Additionally, different types of audio-visual receivers may also need to be acquired depending on what type of audio setup users would like for their gaming experience as well as other factors involved such as room size and sound quality preferences.
Configure Your TV Settings
Once the cables have been connected, it is necessary to configure the television’s settings in order to ensure a successful gaming experience. Adjusting audio and video settings on the TV is an important step as they will determine the quality of sound and visuals while playing. The audio configuration should be set according to the specifications of the game console’s audio output. This setting can usually be found under an ‘audio’ or ‘sound’ menu. It is also essential to adjust video settings such as brightness, contrast, color levels, and resolution; otherwise, these can affect gameplay negatively. To get optimal clarity and detail from a game’s graphics, choosing the appropriate display mode or resolution for your TV model is key. Some TVs may require manual configuration for this feature while others may automatically detect and switch between compatible resolutions when needed.
When configuring display settings, it is important to note that different games may require different display modes depending on their graphical complexity. Playing certain games with incorrect video settings can lead to poor picture quality or even cause lagging during intense moments of playtime due to inadequate performance from the TV’s hardware capabilities compared with what was expected by the game’s software requirements. As such, it is recommended that users experiment with different display options until they find one most suitable for their particular system setup before committing long periods of time into any specific game title.
It should also be noted that not all TVs are capable of displaying 4K content effectively; therefore those wishing to utilize higher resolution displays must ensure compatibility before purchase if possible or look into alternative solutions like external monitors or projectors instead. Furthermore, some televisions may offer additional features such as motion smoothing or image enhancement which can improve user experience but also diminish visual fidelity in some cases; thus making them best suited only for casual gaming rather than competitive scenarios where every frame counts towards victory or defeat.
Test the Connection
After the settings have been configured, it is important to test the connection between the console and television to ensure proper functionality. Checking compatibility between the game system and TV is a crucial step in this process. This requires that users verify that their gaming system is compatible with the type of video cable being used, as well as ensuring that both devices are capable of handling any special features associated with their game system setup. It may also be necessary for users to check if their TV supports High-Definition (HD) or other high-resolution formats, depending on what type of games they plan to play.
Once a user has confirmed compatibility, connecting their console to the TV should be relatively straightforward following instructions provided by either device’s manual. After plugging in all necessary cables securely and switching both devices to ‘on’ mode, a quick test can be performed by turning on a simple game or application from each device. If everything is connected correctly, then users should see an image on their television screen that corresponds with what appears on their console display monitor.
Any discrepancies at this point could indicate an issue with either device’s settings or even something more serious such as hardware malfunctioning or incompatibility between devices. In these cases, it may be useful for users to double-check all connections before proceeding further into troubleshooting steps laid out in either device’s instruction manual.
Frequently Asked Questions
How do I know which cables to use?
When it comes to connecting a video game console to a television, the first step is determining which cables are necessary. Generally, HDMI ports are needed for connection and if the device does not have one, wireless adapters may be used. An HDMI port supports both audio and video signals as well as providing an enhanced picture quality compared to other cable types. Wireless adapters typically require additional equipment such as a router or modem, but can provide a more flexible option for gamers due to their lack of cables.
What type of TV is compatible with my console?
When connecting a video game console to a television, it is important to consider the different connectivity options and types of consoles available. HDMI is the most common and versatile connection method, allowing for HD audio and video output on modern consoles like the PlayStation 4 and Xbox One. Older consoles may require component cables or composite cables depending on type. For instance, Nintendo 64 requires an RF Switch while Super Nintendo uses an RCA Composite cable. Additionally, some newer Smart TVs are compatible with certain gaming systems such as the PlayStation 4 Pro or Xbox One S which support streaming services and improved image quality. Therefore, when considering what type of TV is compatible with your console, it is important to first determine which connection types are supported by both devices and if any additional features can be utilized.
Are there any other steps I need to take before connecting the console to the TV?
Before connecting your console to the TV, it is important to check the resolution settings and video quality. Many consoles are compatible with most modern TVs, but if the resolution settings are not properly configured, you may experience issues such as poor video quality or non-optimal performance. Checking for compatibility between the console and TV, adjusting display setting preferences, and verifying that all cables are connected correctly will help ensure a good connection between the two devices. Additionally, any additional software installation required by the console should be completed before attempting to connect it to the TV.
Is there a specific way to organize the cables for a better connection?
When connecting a video game console to a television, the way in which the cables are organized can affect how well the connection is made. Audio connections should be connected first, followed by HDMI cables. If possible, it is recommended to keep the cables as far away from other electronics as possible since they can interfere with signal quality. It’s also important to make sure that all cords are properly and securely connected – loose or disconnected cables may cause poor audio and video performance.
Is there a way to connect the console wirelessly?
Wireless setup is an option for connecting video game consoles to a television. Depending on the type of console, there are different ways to connect wirelessly. For instance, some consoles use Bluetooth technology to easily connect without the need for wires or cables. Other consoles may require certain adapters in order to achieve a wireless connection. Additionally, many televisions come equipped with built-in wireless technologies that enable direct connection from the console without any additional equipment. Setting up a wireless connection between a video game console and television can provide more freedom of movement while playing and eliminate the need for having cords and cables running across the floor.
Conclusion
In order to attach a video game console to a television, several steps are necessary. First, the appropriate cables must be gathered and connected from the console to the TV. Once these connections have been established, the TV settings will need to be adjusted in order to ensure compatibility with the video game console. After completing these steps and testing the connection, playing video games on a television is possible. This process is simple enough that anyone can do it with relative ease by following instructions provided by most manufacturers of gaming consoles. By connecting a gaming console properly, users can enjoy an immersive gaming experience on their TVs with improved graphics and sound quality compared to other methods of playing video games.


